
Standard, Advanced and Pro: three levels of detail
The same app, three levels of detail. Standard is calm and simple; Advanced and Pro add detail in place, for people who want to see more. All three are included in every plan.
4 min read · updated Nov 8, 2026 · 2.0
Standard (the default)
One idea per screen, with details on request. Everything in the other guides is shown as it looks in Standard.
Advanced
The same screens, with more detail where you already are:
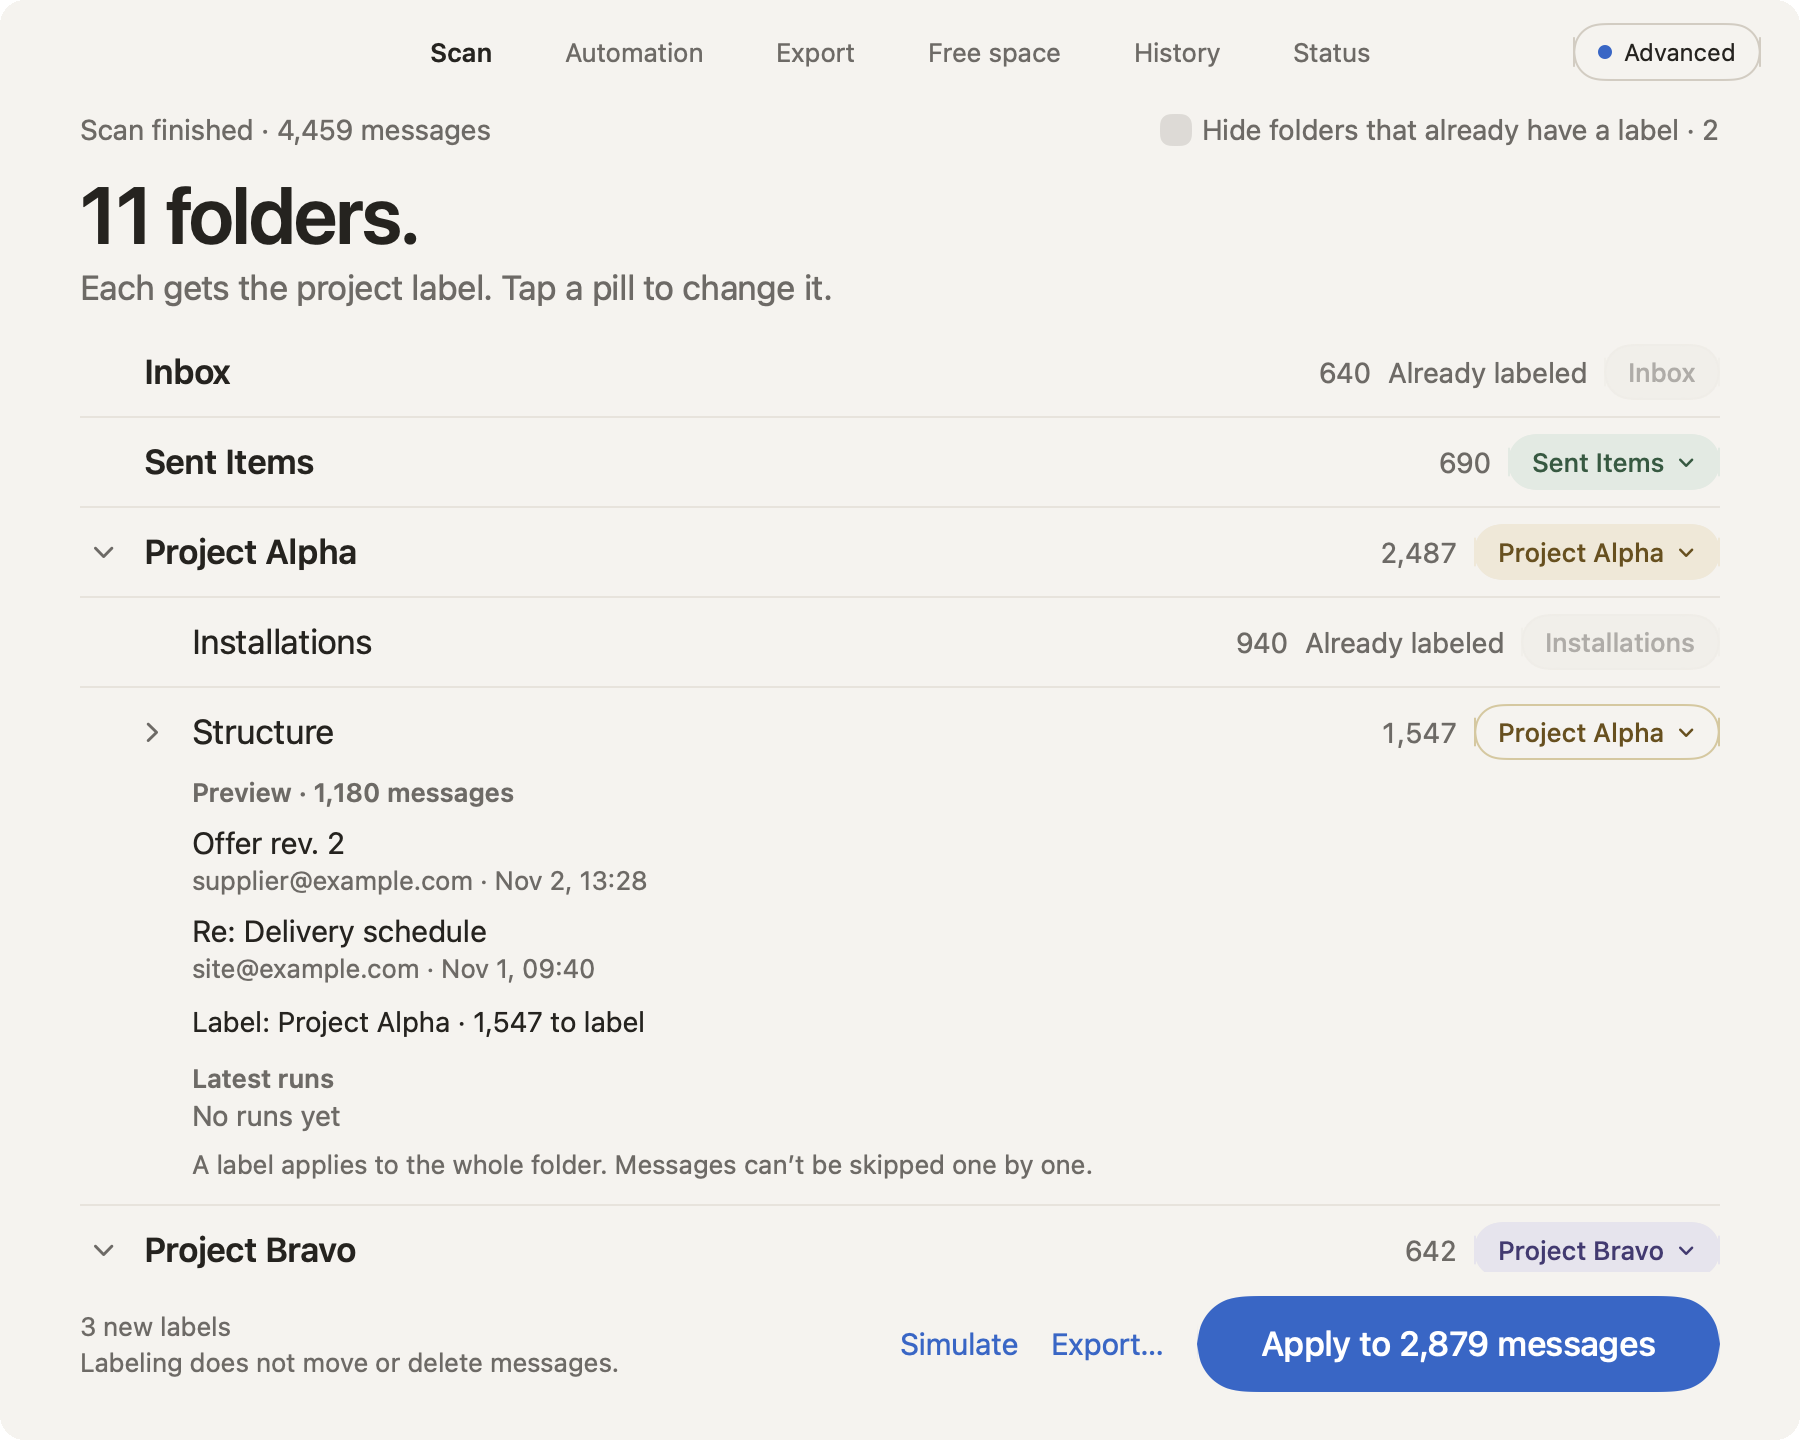
- 1
The mode chip
Shows the level you are on.
- 2
Rows that open
Click a folder and it opens in place.
- 3
A preview
The latest messages of the folder (subject, sender, date). Klasor reads them from Outlook only when you ask, and keeps them in memory only.
- 4
The label
What will be applied and how many messages are left to label.
- 5
Latest runs
The last 3 labeling runs of that folder.
- 6
Simulate
Shows what would happen, without changing anything in Outlook.
On Status, Advanced adds the number of unlabeled and unexported messages (with Label and Export buttons), and a row for Automation. History rows open to show the export location, Open location and View manifest.
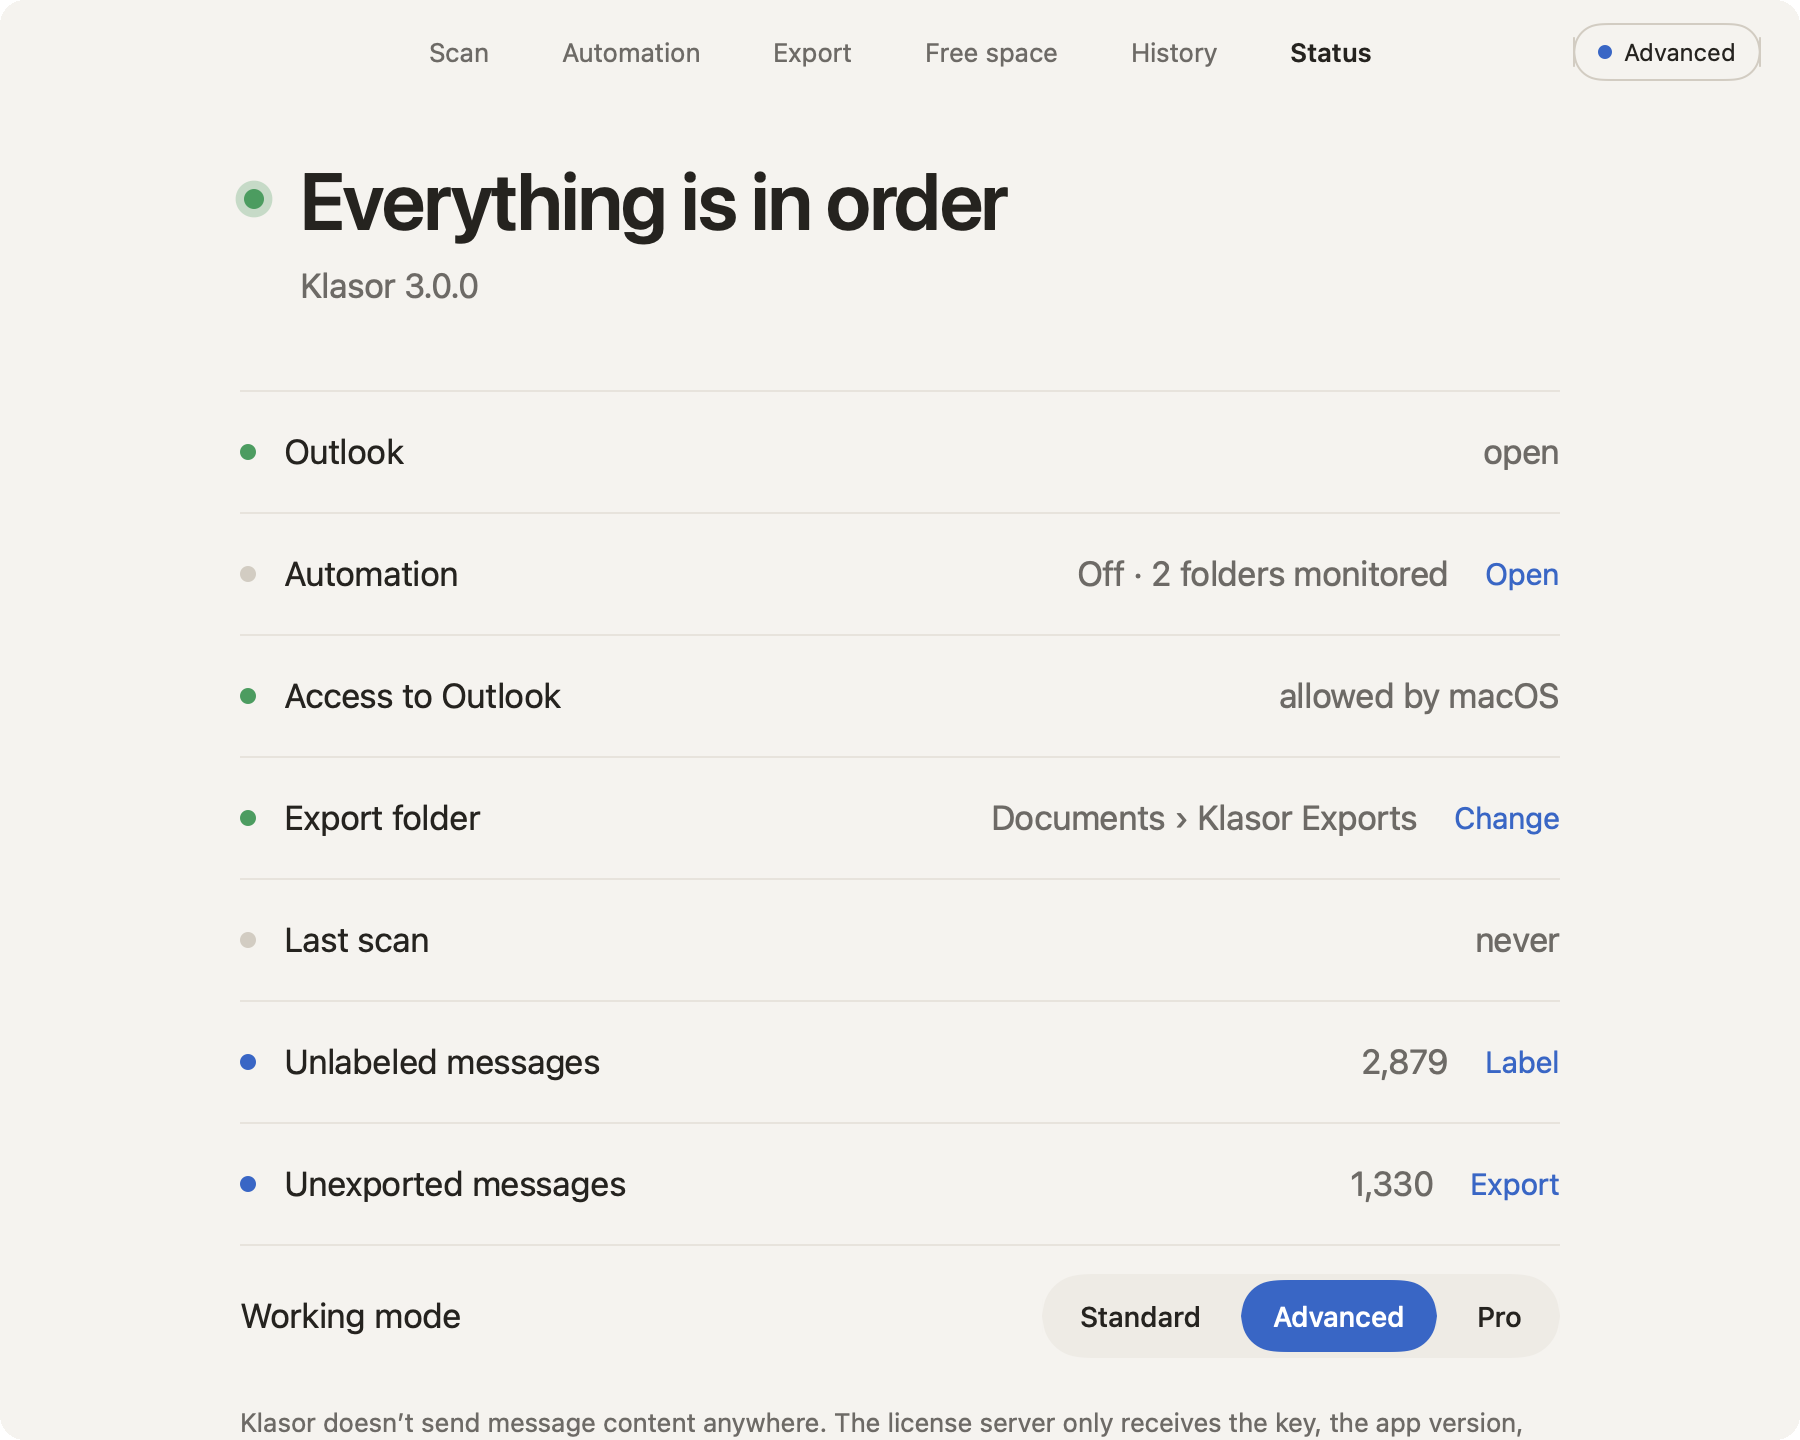
- 1
Automation
Off or on, with how many folders are monitored. Open goes to Automation.
- 2
What is left to do
Messages without a label and messages not yet exported, as of your last scan.
- 3
Working mode
Standard · Advanced · Pro, whenever you want to change.
Pro
A wider window (1180 × 720) with a permanent side panel, made for speed:
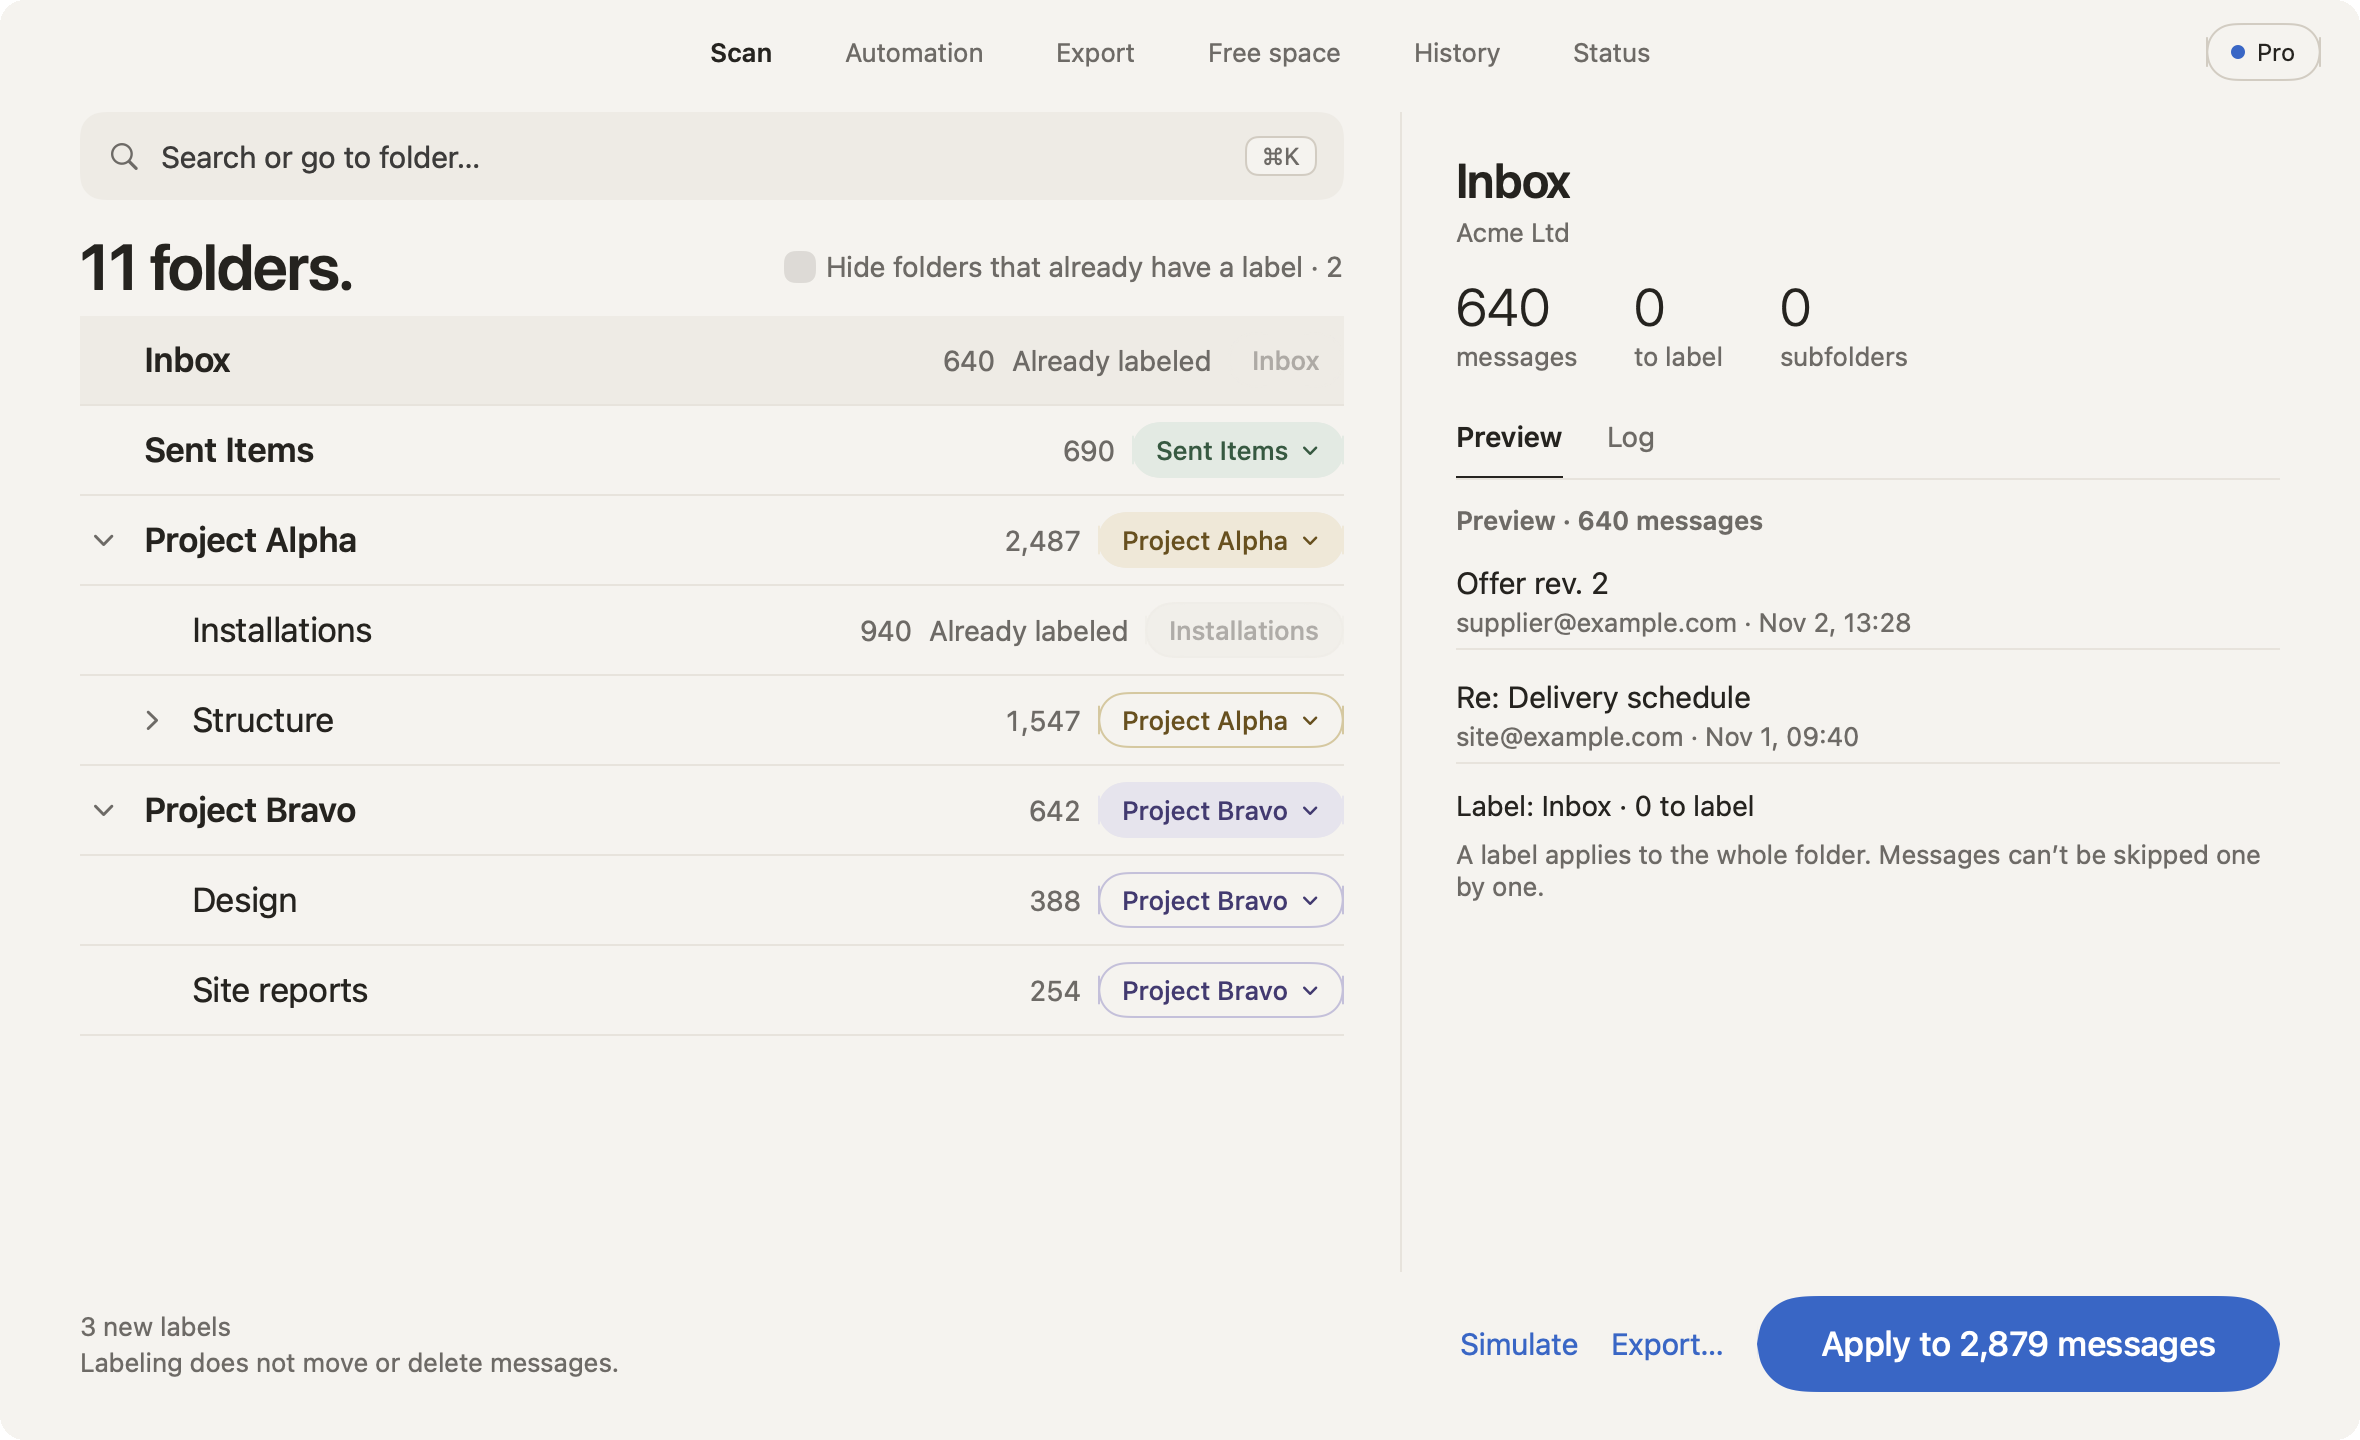
- 1
Search or go to folder… ⌘K
Type part of a folder name (accents and capitals don’t matter) and press Return to jump to it; its parent folders open.
- 2
The list
The same folders, in a wider layout.
- 3
The side panel
Always open: the selected folder, with its number of messages, how many are left to label and how many subfolders.
- 4
Preview and Log
The latest messages of the folder, and its last 10 runs.
- 5
Apply
Always visible at the bottom, next to Simulate and Export.
Free space in Advanced and Pro
In Standard, Free up space uses safe settings and tells you what it keeps. Advanced and Pro show the settings:
- Keep in Outlook: three settings that decide what is never moved: Unread messages, Flagged messages and Messages newer than a number of days (30 by default). Change them before you press Review, or on the review screen followed by Check again.
- Also allow Exchange accounts (not tested by Klasor): a tick box that, after a confirmation, lets Klasor move messages on Exchange accounts, only into Deleted Items. Free the space now stays off for them.
- Also allow Free the space now on IMAP providers other than Gmail (not tested by Klasor): another tick box with its own confirmation. Without it, Free the space now is offered only for Gmail.
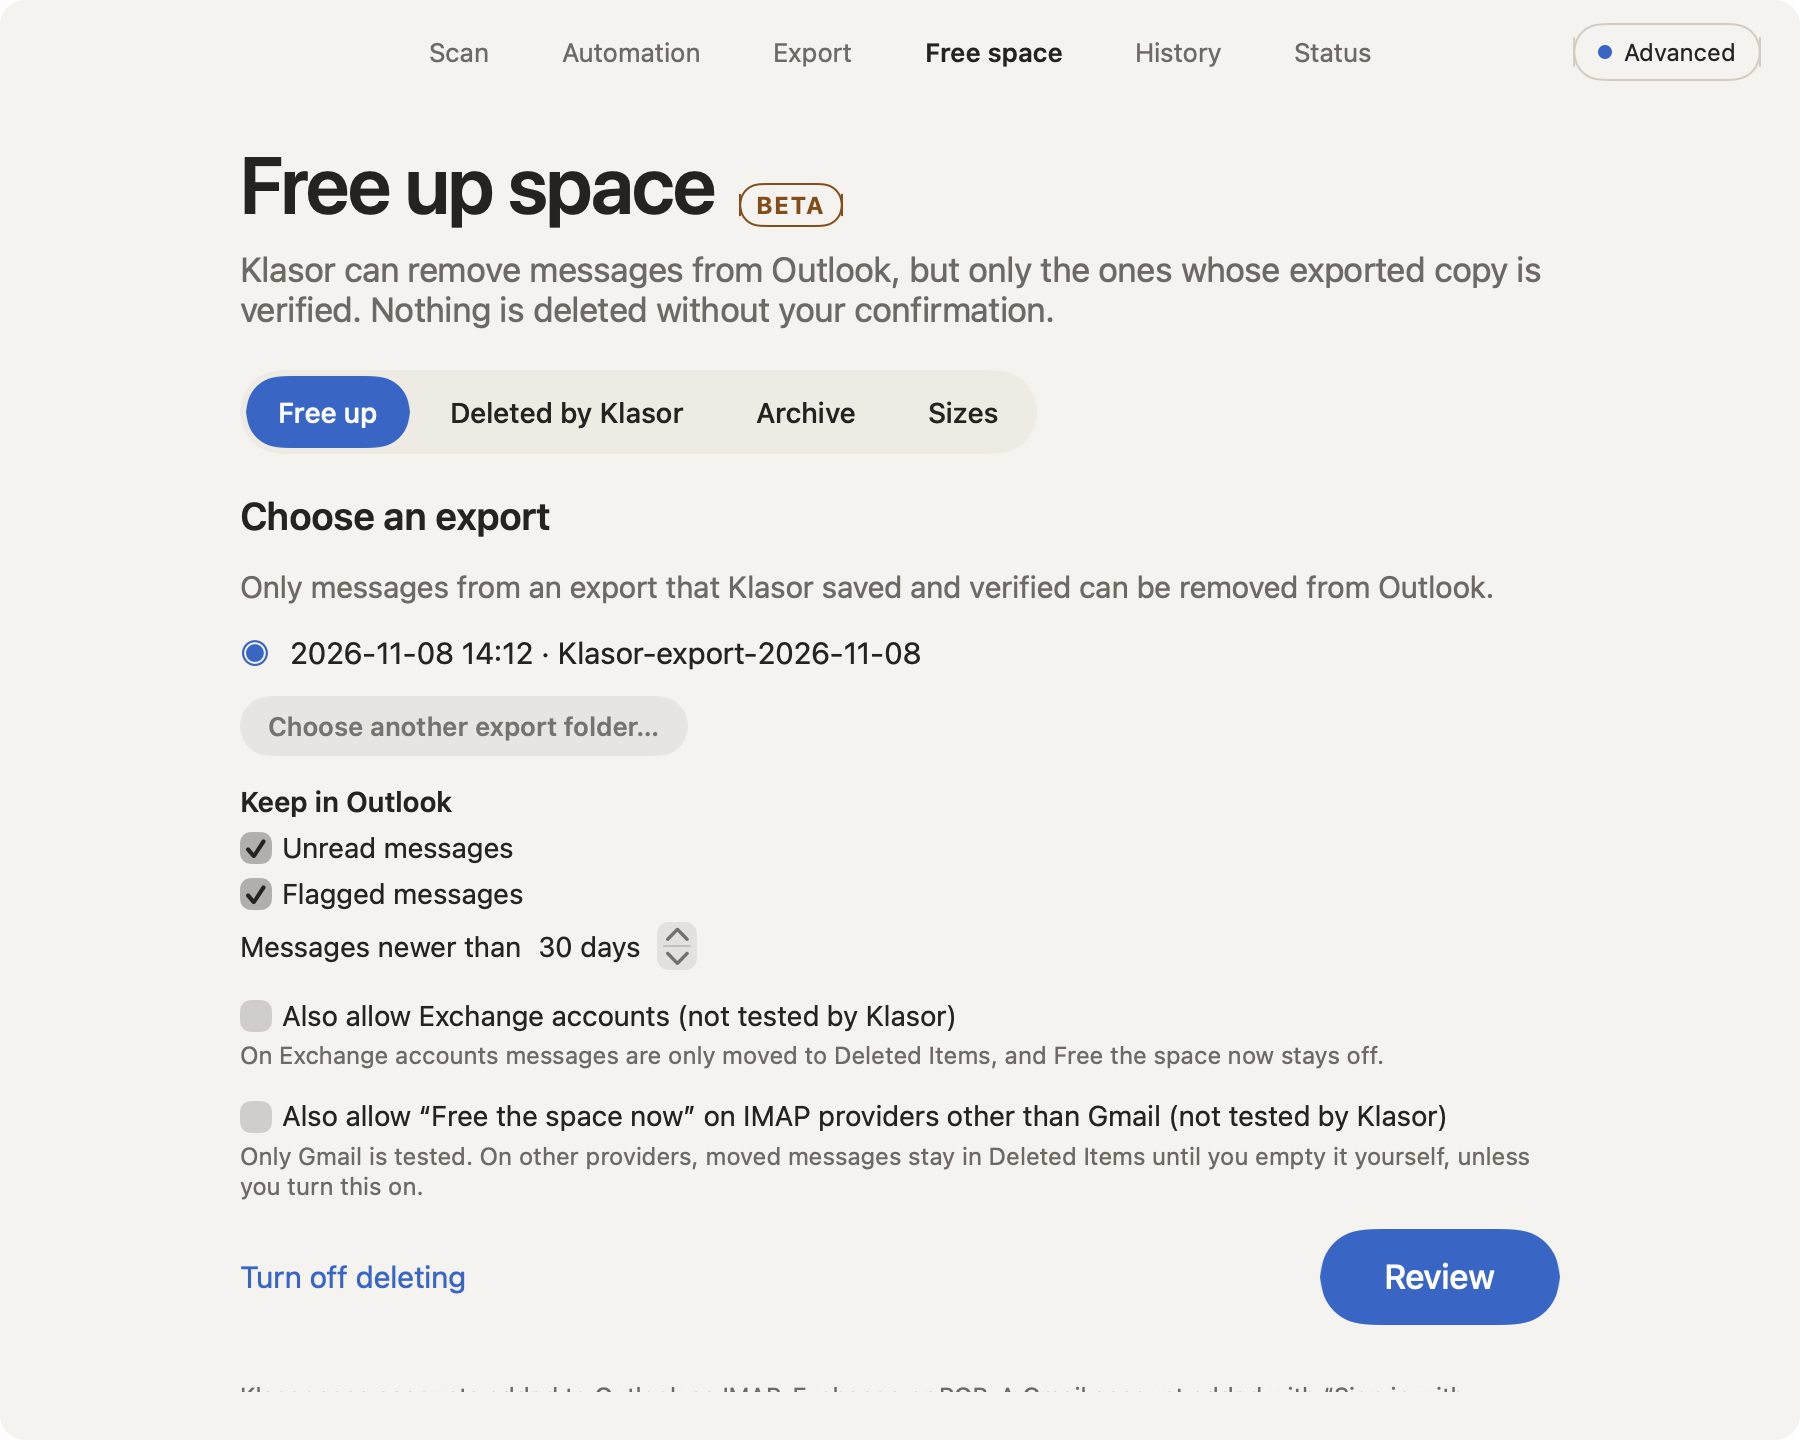
- 1
The mode
The chip shows the level you are in.
- 2
Keep in Outlook
Unread, flagged and the number of days. Standard keeps these fixed.
- 3
Exchange accounts
Off by default. Ticking it asks for a confirmation: Klasor has not tested Exchange accounts, and Free the space now stays off for them.
- 4
Other IMAP providers
Off by default. “Free the space now” is automatic only for Gmail. Ticking this asks for a confirmation and extends it to other IMAP providers, which we have not tested.
- 5
Review
As in Standard.
How to switch
The levels are switched on from Status: click the version line (for example “Klasor 3.0.2”) 4 to 5 times in a row for Advanced, or 8 to 10 times for Pro. After the first time, a Working mode selector appears on Status (and in the View menu), where you can pick Standard, Advanced or Pro whenever you like.
Your choice is remembered. Changing the level never changes your data or your labels.