
Installation and first launch
From the installer file to your first scan: the installer, the permission for Outlook, and what to do if macOS asks you something.
3 min read · updated Nov 8, 2026
What you need
- A Mac running macOS 13 or later (Intel or Apple Silicon).
- Microsoft Outlook for Mac, the classic (Legacy) version, with your account added. Klasor cannot control “New Outlook”.
- Office 2024 for Mac includes only the new Outlook, which Klasor cannot control; classic Outlook comes with Microsoft 365 (see the Legacy Outlook guide).
- Your account added to classic Outlook in a way Klasor can see: Gmail, iCloud and other accounts as IMAP. See Which accounts work, and how to add them.
- The
Klasor-Install.pkginstaller.
Steps
- InstallDouble-click
Klasor-Install.pkg→ Continue → Install (your Mac password). The app lands in Applications and starts on its own. - Open itThe installer is signed by ENGINEERIO S.R.L. and checked (notarized) by Apple, so macOS opens it normally. At most, macOS asks you to confirm that you downloaded it from the Internet: click Open. Send the installer to other people as a download link, with AirDrop or on a USB stick; e-mail filters often block
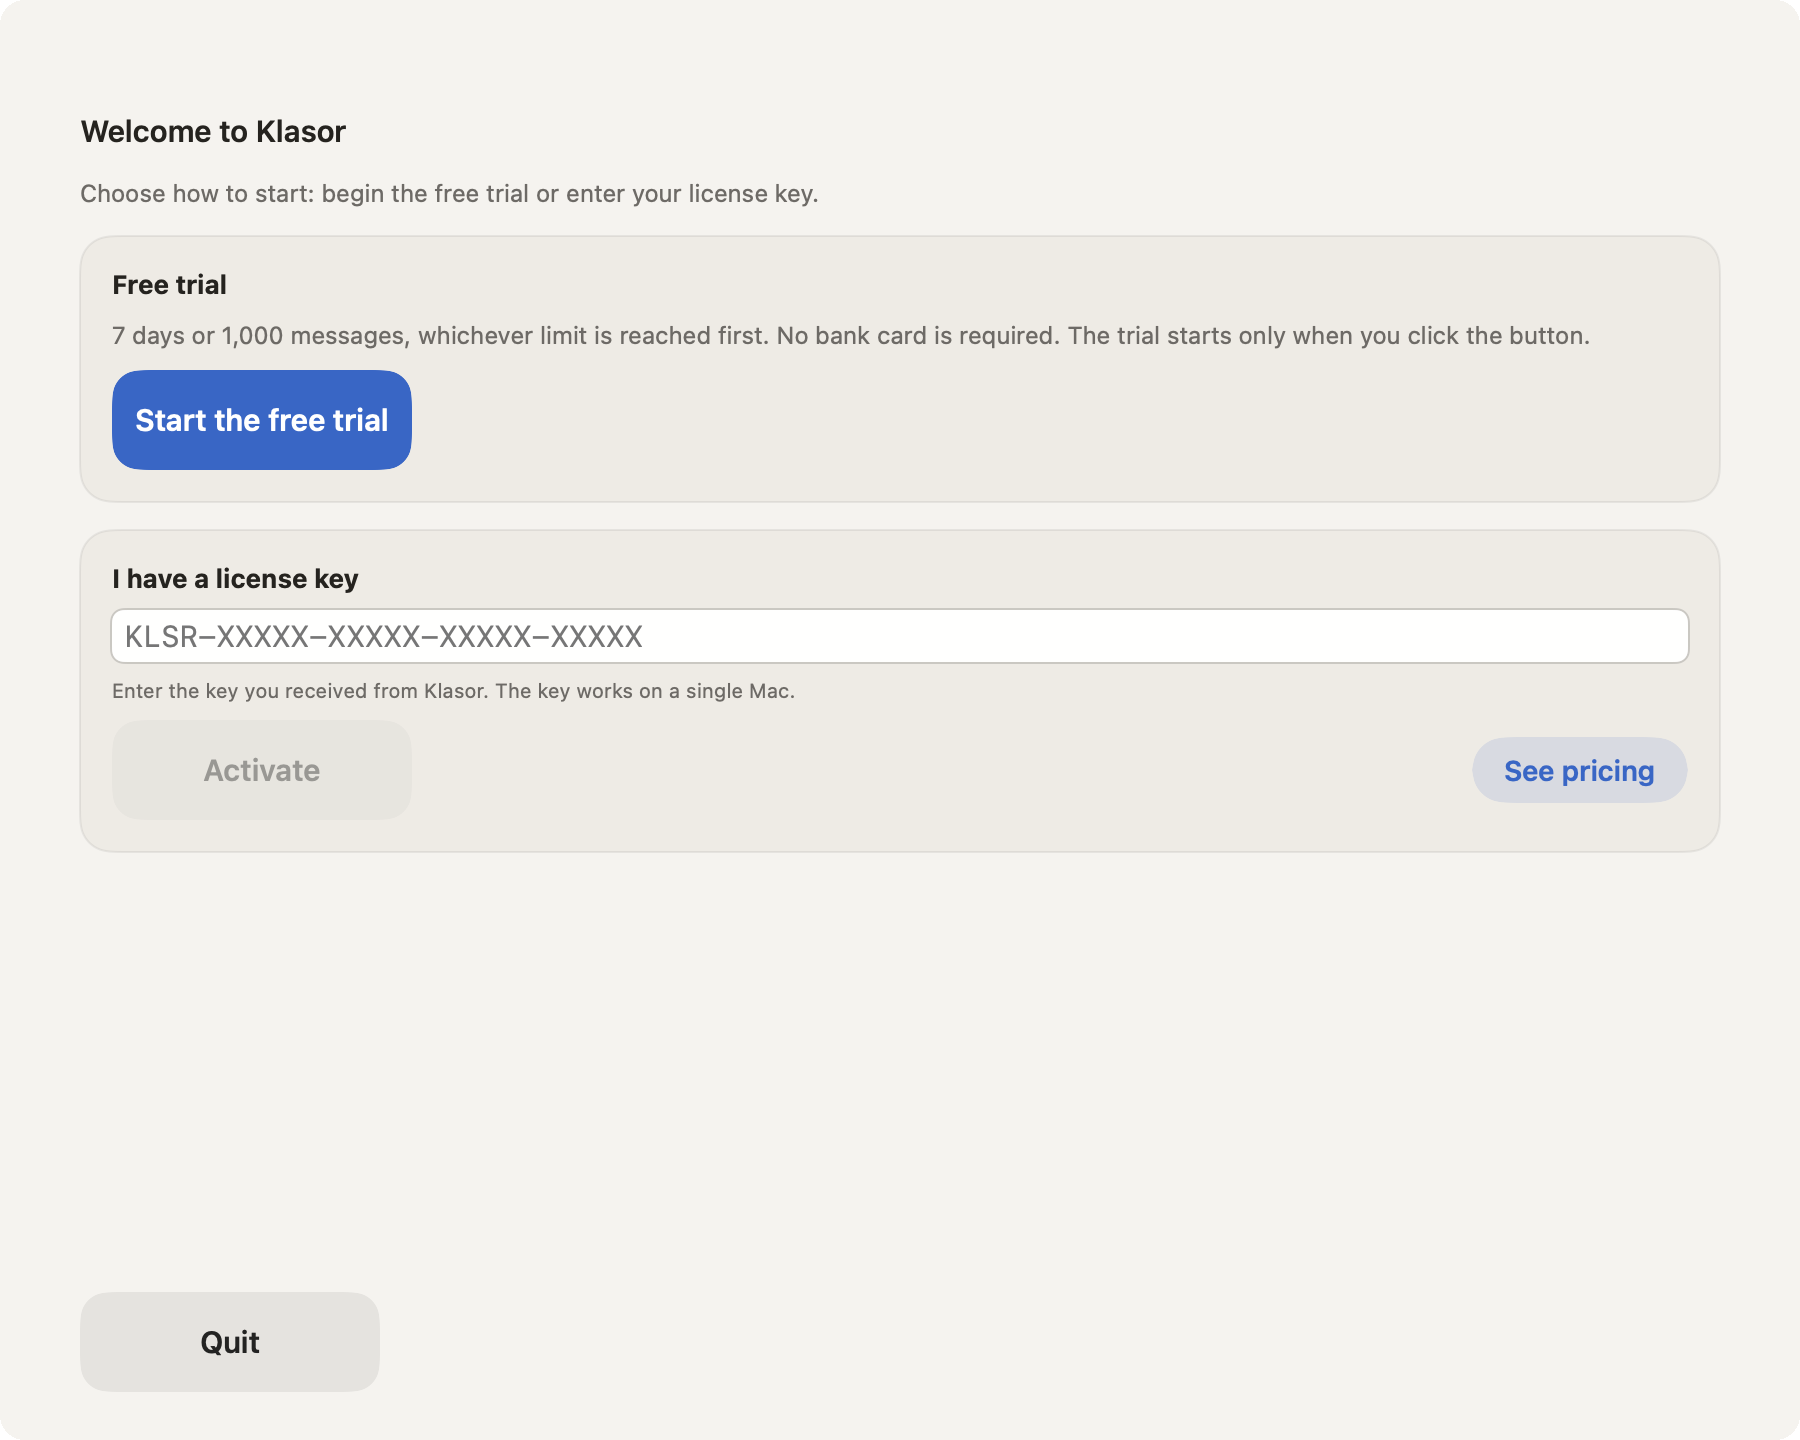
.pkgfiles. - Choose how to startOn first launch Klasor shows a welcome screen (the next figure). Start the free trial or enter your license key. The trial starts only when you click the button.
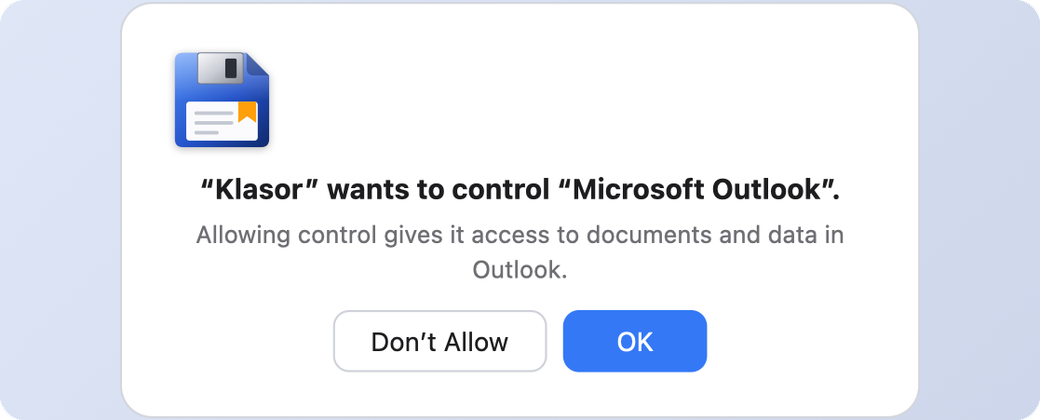
- Allow control of OutlookmacOS asks whether Klasor can control Outlook. Click OK. Without this permission, Klasor can’t read your folders or apply labels.
- ScanContinue with scanning your mailbox and choosing labels.
- 1
Free trial
7 days or 1,000 messages, whichever limit is reached first. No bank card is required, and nothing is charged afterwards.
- 2
Start the free trial
The trial starts only when you click this button.
- 3
I have a license key
Paste the key you received (it looks like
KLSR-XXXXX-XXXXX-XXXXX-XXXXX) and press Activate. The key works on a single Mac. - 4
See pricing
Opens the pricing page on this site.
- 1
The macOS prompt
It appears only once. The exact wording depends on your macOS language. It says who is asking for access (Klasor) and to what (Microsoft Outlook).
- 2
OK
Grants the permission. From then on Klasor can scan your folders and label messages. It never sends messages, and it moves messages out of Outlook only if you turn on freeing space and confirm.
If you clicked “Don’t Allow”
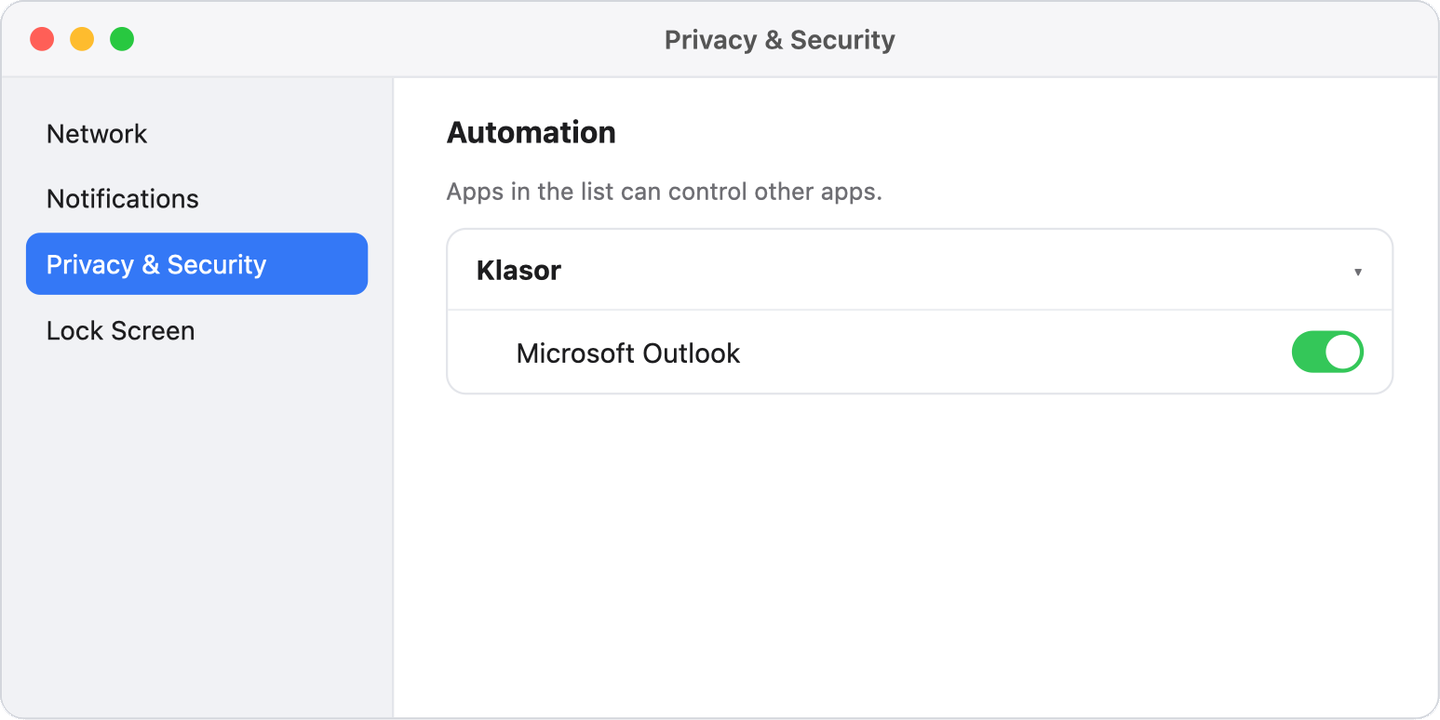
It’s not a problem, and it’s easy to fix. Open System Settings → Privacy & Security → Automation and turn on Outlook for Klasor. While the permission is missing, automatic runs are skipped and Status shows “Needs attention”.
- 1
Privacy & Security
The section of System Settings where macOS keeps app permissions.
- 2
Klasor
The Automation page lists every app that has asked to control another one. If Klasor is missing, open it once and click an action that uses Outlook again.
- 3
The Microsoft Outlook switch
It must be on. Without it, macOS returns an access error (-1743) to Klasor, and Klasor stops with a clear message (error code KL-103).