
.olm export: a secondary backup, including by category
An .olm file keeps your messages and folder structure in Outlook’s format. How to make one in Legacy Outlook, whole or for a single category, and how to export several labels at once with Klasor.
7 min read · updated Nov 8, 2026
What to know first
- The .olm export exists in Legacy Outlook for Mac. See the Legacy guide, including the end of support in October 2026.
- An .olm opens only in Outlook for Mac (importing works in Legacy). It isn’t a format for other programs.
- The file doesn’t contain account settings or Outlook preferences, only data.
- Treat the .olm file as an unencrypted file: keep it on a protected disk.
- The export includes data from all configured accounts; a single mailbox can’t be exported on its own.
- Don’t keep the .olm file in a cloud-synced folder: there’s a risk of corruption.
Steps
- Open the exportIn Legacy Outlook, from the File menu choose Export… (or the Export button on the Tools tab). If you don’t see the option, update Outlook (Help → Check for Updates).
- Choose what to exportIn the Export to Archive File (.olm) box you have two options: Items of these types (select the types: Mail, Calendar, Contacts, Tasks, Notes) or Items in the category (choose a single category from the list). Then Continue.
- Choose where to saveIn Save archive file as, choose the location (Where, or Downloads under Favorites) and click Save.
- FinishAt the end you get a notification; choose Finish. You can move the file to another Mac or to a storage location.
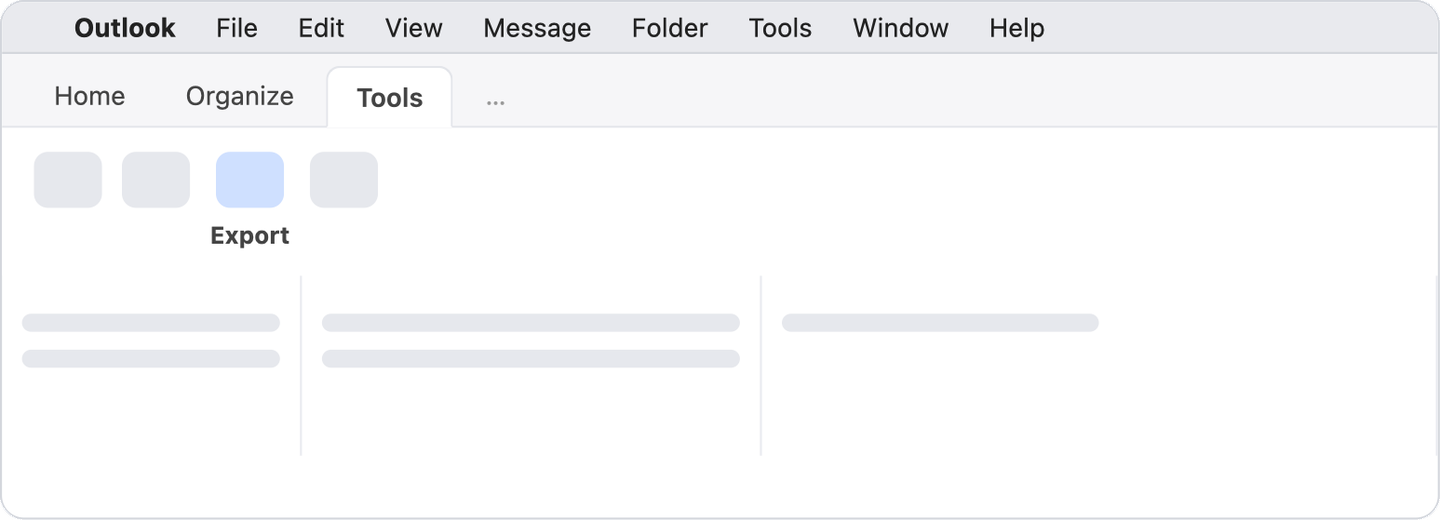
- 1
The Tools tab
The Export button is here.
- 2
Export
Opens the archive dialog.
- 3
The File menu (alternative)
If the button is missing from Tools, use the File → Export menu.
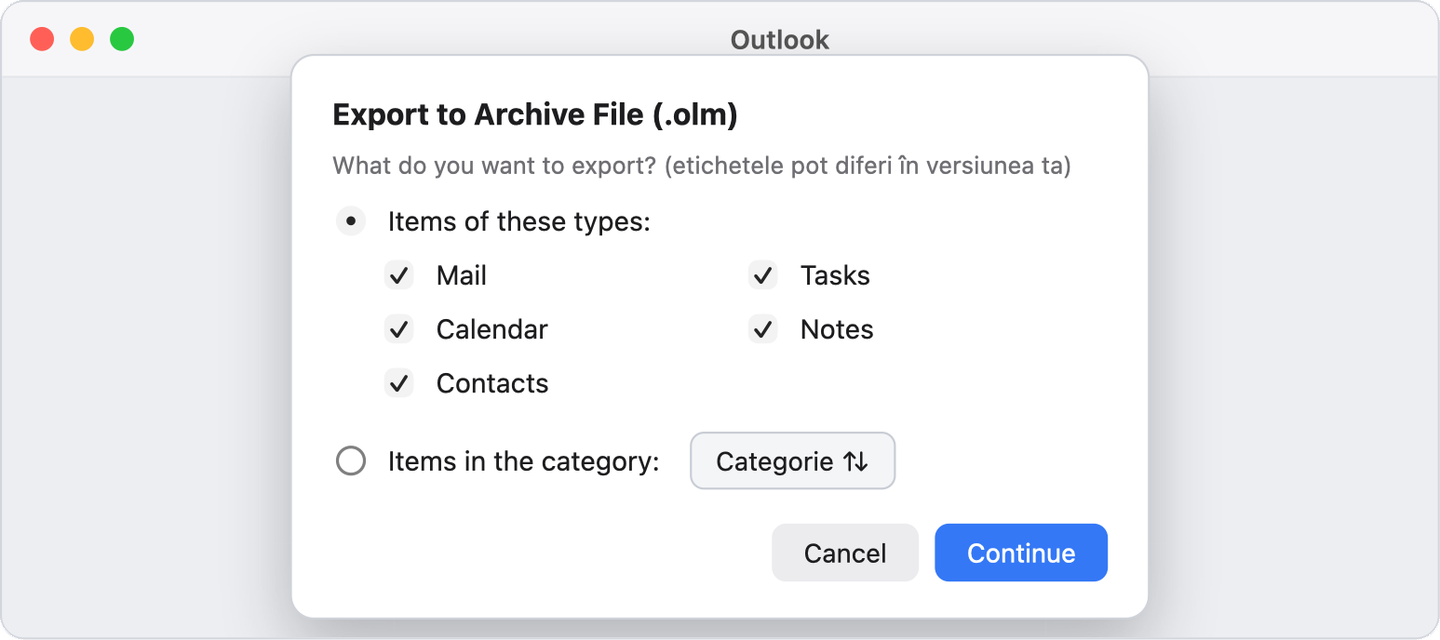
- 1
The export dialog
“Export to Archive File (.olm).”
- 2
Items of these types
The “everything in the selected types” option: email, calendar, contacts, tasks, notes.
- 3
Items in the category
The “just one category” option: select it and choose the category from the list (only one). The same categories that Klasor applies.
- 4
Continue
Moves on to choosing where to save.
Exporting a single category
- In the dialog, choose Items in the category and a category from the list. The list contains all the categories in Outlook (the ones Klasor applied are there, like any other category).
- You can choose only one category per export. For several, repeat the export and you get one .olm file for each.
- The result is a single .olm file with the items from that category, from all configured accounts.
Several labels at once, as .eml files
Klasor’s .eml export does the same thing, but with several labels in one export: under Export, choose By label, select the labels, and you get one folder per label, then by account and folder, with a manifest and double verification. It isn’t the .olm format, but it can be read anywhere. .eml export guide.